FMI runner
What is this?
The Functional Mock-Up Interface (FMI) is a standard for the exchange of dynamic simulation models. Currently, it is the de-facto industry standard for co-simulation. A model implementing the FMI standard is called Functional Mock-Up Unit (FMU).
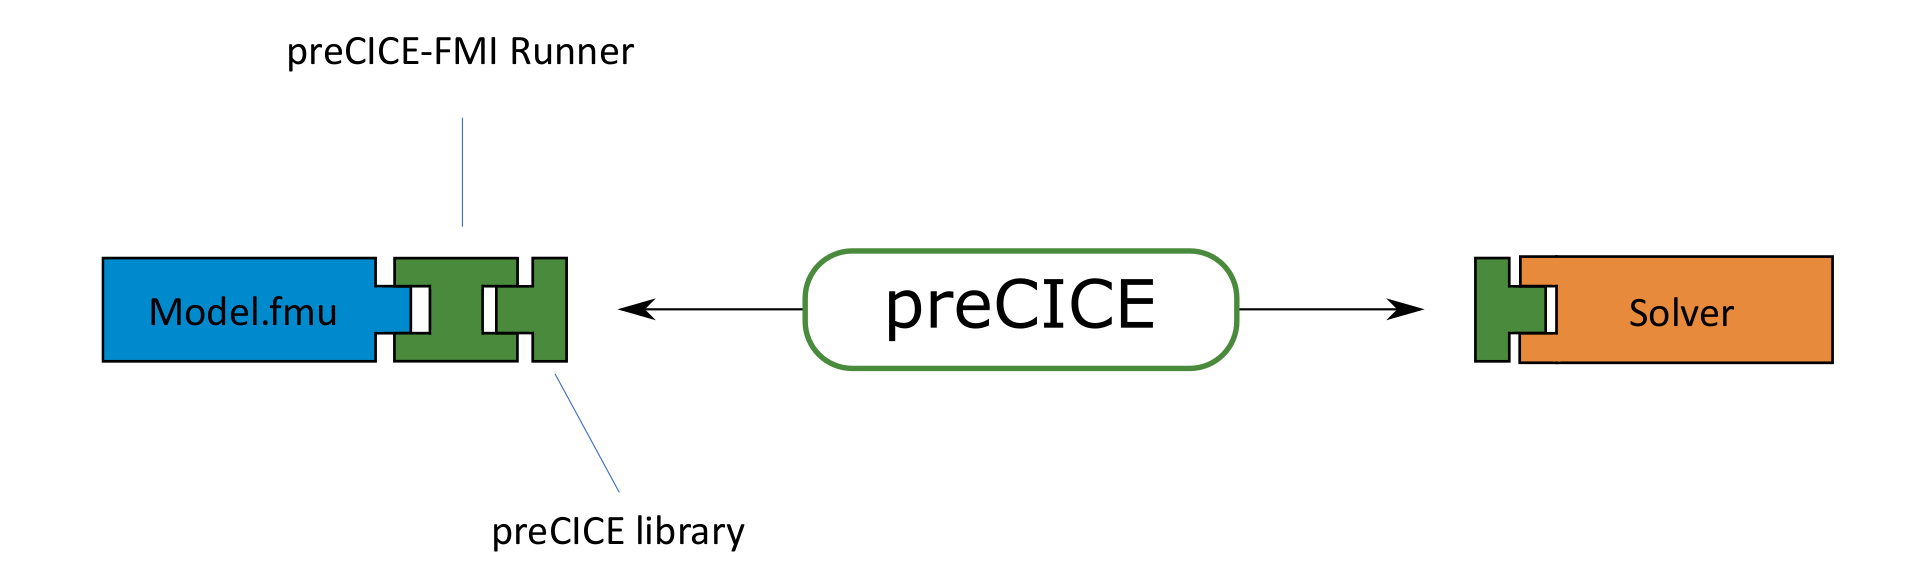
The preCICE-FMI runner contains the script fmiprecice to couple FMU models with other simulation tools via preCICE. The runner serves as an importer for the FMU to steer the simulation. Additionally, the runner calls the preCICE library to communicate and coordinate with other simulation tools.
Usage
The runner is called from the terminal with the command fmiprecice. It takes two input files: one with settings for the FMU simulation and one with settings for preCICE. Start the runner by pointing to the input files:
fmiprecice ./fmi-settings.json ./precice-settings.json
Read on to find out how to install and configure the runner. More information about the software, its abilities, and its limitations can be found in [1] and [2]. If you are ready to run your first case, have a look at the oscillator tutorial.
Get the Runner
Releases
First, install the necessary dependencies:
- Python3 including pip
- preCICE v3
Then, get released versions from PyPI:
pip install fmiprecice
You are good to go! Read below how to configure the FMI runner or directly run your first simulation: the oscillator tutorial.
Develop version
If you need the latest develop version, you can install from the repository.
First, install the necessary dependencies:
- preCICE
- v0.1 of the runner requires preCICE v2, v0.2 requires preCICE v3
- pyprecice: Python language bindings for preCICE
- NumPy
- FMPy (tested for v0.3.13 to v0.3.20)
To install the three python packages from PyPI:
pip install pyprecice numpy fmpy
The software is hosted on GitHub. Clone the repository and switch to the root directory:
git clone https://github.com/precice/fmi-runner.git
cd fmi-runner
To use pip for the installation, create a virtual environment and install the package:
python -m venv .venv && . .venv/bin/activate
pip install -e .
The editable flag -e allows you to update the FMI runner by pulling the repository.
Maybe you need to add your user installation to your path to make the new software findable. To do so, run the command:
export PATH=$PATH:$HOME/.local/bin
Configuration
We use two settings files to configure the software for a specific simulation case.
Configure the FMU
The file fmi-settings.json holds all the necessary information to run a simulation with the FMU. Additionally, you can choose which data should be exchanged with preCICE.
{
    "simulation_params": {
        "fmu_file_name": "../Suspension.fmu",
        "fmu_read_data_name": ["force"],
        "fmu_write_data_name":["position"],
        "fmu_instance_name": "suspension_1",
        "output_file_name": "./results/suspension-data.csv",
        "output": ["force", "position"]
    },
    "model_params": {
        "apply_filter": true,
        "spring_coeff": 65.0
    },
    "initial_conditions": {
        "position":     0.0

    },
    "input_signals": {
        "names":["time",    "damping_coef"],
        "data": [
                [0.0,       0.0],
                [2.0,       5.0]
                ]
    }
}
The config file allows you to access and manipulate the variables within the FMU model. Therefore, the variable names have to match with the variables listed in the ModelDescription.xml of the FMU.
Let us have a closer look at the specific dictionaries:
simulation_params: The list fmu_read_data_names is used to specify the read data of the FMU, while the list fmu_write_data_names concerns the write data. If you exchange scalar data, use a list with one entry. If you exchange vector data via preCICE, the number of list entries has to match the dimensions defined in the precice-config.xml. For example, to read a two-dimensional force on two scalar FMU variables use
    "simulation_params": {
        ...
        "fmu_read_data_name": ["force_1", "force_2"],
        ...
    }
Optionally, you can choose variables in output that are tracked and stored as a timeseries in output_file_name.
model_params: Use this to set internal parameters before the start of the simulation. In this example, the parameters apply_filter and spring_coeff are set. The keys of this dictionary are the names of specific FMU variables.
initial_conditions: Use this to set initial conditions for internal parameters. Again, the keys of this dictionary are the names of specific FMU variables.
input_signals: You can set time-dependent input signals. The list names holds the different parameters. The first entry of this list is always time. The list data sets the input values for the variables given in time. The first entry of each nested list in data is the time at which the following data is set. Here, damping_coef is set to 5.0 at t=2.0. Of course, you can also set the values of boolean and string parameters.
Configure the coupling
The file precice-settings.json is used to configure the coupling with preCICE. It consists of one dictionary coupling_params.
{
    "coupling_params": {
        "participant_name": "Suspension",
        "config_file_name": "../precice-config.xml",
        "mesh_name": "Suspension-Mesh",
        "read_data_name": "Force",
        "write_data_name": "Position"
    }
}
participant_name and mesh_name need to match the entries in precice-config.xml. The same is true for write_data_name and read_data_name, which control the data exchange.
Limitations
Current limitations of the FMI runner software are:
- Can only be used with Co-Simulation FMUs (FMI 1,2,3)
- All accessed FMU variables are scalar
- Data can only be exchanged via one vertex. The exchange of multiple vertices or full meshes is not possible.
How to cite
If you are using the FMI runner, pĺease consider citing the following Thesis:
@incollection{
    Willeke:2023,
    author    = {Willeke, Leonard and Schneider, David and Uekermann, Benjamin},
    title     = {A preCICE-FMI Runner to Couple FMUs to PDE-Based Simulations},
    booktitle = {Proceedings 15th Intern. Modelica Conference},
    editor    = {Müller, Dirk and Monti, Antonello and Benigni, Andrea},
    publisher = {Linköping Electronic Conference Proceedings},
    year      = {2023}
}
References
[1] L. Willeke, D. Schneider, B. Uekermann, A preCICE-FMI Runner to Couple FMUs to PDE-Based Simulations, Proceedings 15th Intern. Modelica Conference, 2023
[2] L. Willeke, A preCICE-FMI Runner to couple controller models to PDEs, Master Thesis, University of Stuttgart, 2023